This guide will teach you how to deploy your app to the Google Play console.
This tutorial guides you through the process of deploying your app to the Google Play Console. Follow these steps carefully to ensure a smooth deployment.
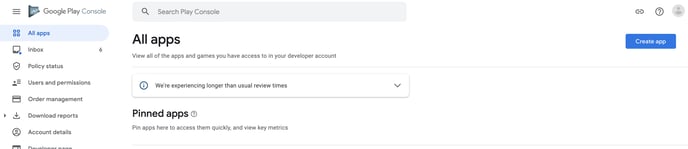
Create a New App
-
Log in to Google Play Console: Google Play Console
-
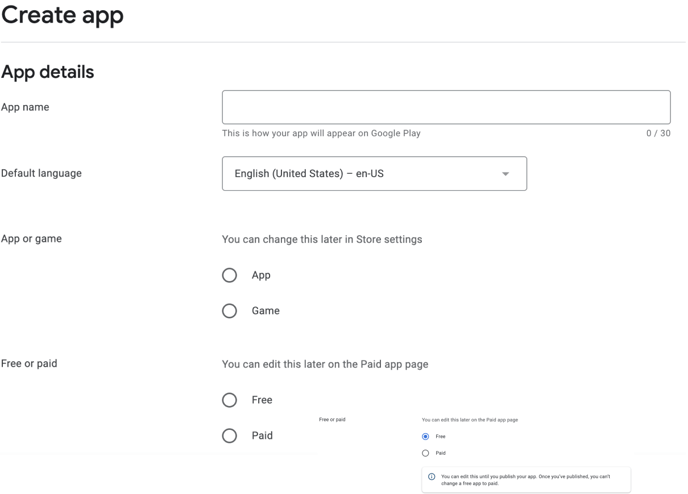
Click on Create app:
- App Name: Enter the name of your app.
- Default Language: Select from the drop-down menu.
- App or Game: Choose whether it’s an app or game.
- Free or Paid: Select the pricing model.
-
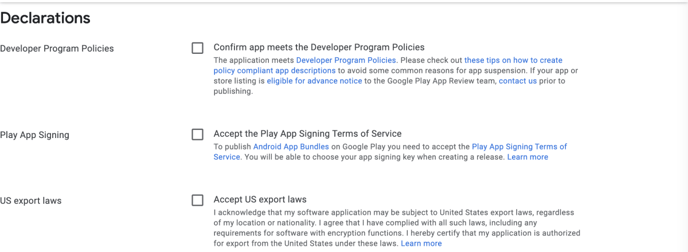
Policies and US Export Laws:
- Confirm that your app complies with the Google Play Developer Program Policies.
- Accept the US export laws agreement.
Google also provides the option to set up internal testing for your project, which can be beneficial for ensuring your app runs smoothly before its official launch. In this article, we will mainly concentrate on guiding you through the steps to Set Up Your App and Publish Your App on Google Play.
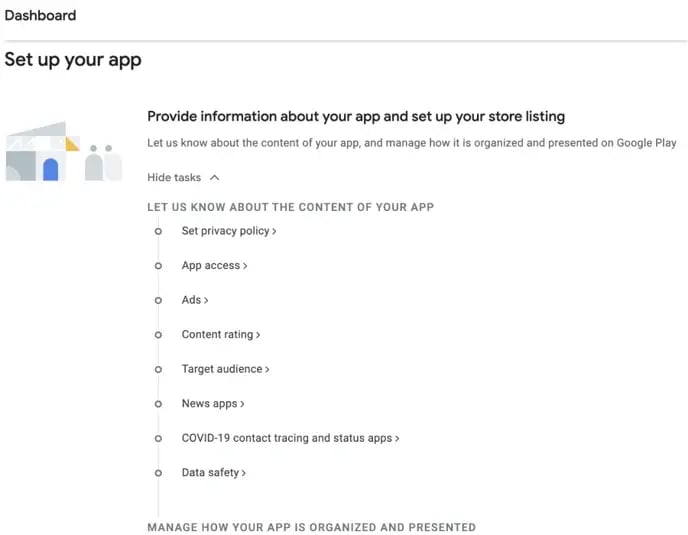
Set Up Your App
-
App Content:
-
App access: is any of your app's content locked behind a paywall or login screen?
-
Ads: does your app serve ads?
-
Content rating: Does your app contain strong language, violence, or other sensitive material?
-
Target audience: Is this app designed for children?
-
News apps: Is the function of your app to provide news updates to your users?
-
Data safety: What user data does your app collect or share?
-
Provide additional information for how your app should be classified and presented on the Play Store:
- Specify an App Category and include Tags to enhance the discoverability of your app on the Play Store.
- Include Contact Details: An email address is mandatory, and you also have the option to provide a phone number or website URL.
- Decide whether your app can be promoted outside of the Google Play store.
Store Listing Requirements
-
App Name to be shown the Play Store
-
Short Description of your app
-
Full Description of your app
-
App Icon
-
512 * 512 pixels
-
Up to 1MB in size
-
-
Feature Graphic
-
1024 * 500 pixels
-
Up to 1MB in size
-
-
An optional YouTube Video URL to demonstrate your app
-
At least two Phone Screenshot
-
16:9 or 9:16 aspect ratio
-
Each side between 320 and 3,840 pixels
-
Up to 8MB in size
-
-
At least one Tablet Screenshot
-
16:9 or 9:16 aspect ratio
-
Each side between 320 and 3,840 pixels
-
Up to 8MB in size
-
All images can be in PNG or JPEG format.
Completing the Data safety form in Play Console
When you're ready to start, here's how you complete and submit your Data safety form on the App content page in Play Console:
-
Open Play Console and go to the App content page (Policy > App content).
-
Under "Data safety," select Start.
-
Before proceeding with the form, take a moment to familiarize yourself with the "Overview" section. This section will outline the questions you will be asked and the information you need to provide. Once you have reviewed this information and are ready to begin, click on the Next button to proceed to the next section.
- Within the "Data collection and security" section, carefully examine the list of user data types that are required to be disclosed. If your app collects or shares any of these user data types, select Yes. If not, choose No.
-
If you selected Yes, confirm the following by answering Yes or No:
-
Whether or not all of the user data collected by your app is encrypted in transit.
-
Whether or not you provide a way for users to request that their data is deleted.
-
-
Select Next to move on to the next section.
-
In the "Data types" section, make sure to select all the user data types that your app collects or shares. Once you have made your selections, click on Next to proceed to the next section. It is essential to complete this section following the guidance provided for data collection and sharing.
-
In the "Data usage and handling" section, answer questions about how the data is used and handled for each user data type your app collects or shares. Next to each user data type, select Start to answer the questions. When you're finished, select Next to move on to the next section.
-
Note: You can change the user data types that are selected by going back to the previous section and changing your selections.
-
-
After answering all questions, the "Store listing preview" section previews the information that will be shown to users on Google Play based on the form answers you've provided. Review this information.
If you're ready to submit your completed form, select Submit. If you want to go back and change something, you can select Back to amend your answers. If you're not sure about something, you can select Save as draft and return to the form later. If you select Discard changes, you'll need to start the form again.
Publish Your App on Google Play

You will be asked which countries and regions you want your app to be available in. Then you will be asked to create a new release.
Step 1: Create an Internal test track release
A release is a combination of one or more app versions that you'll prepare to launch an app or roll out an app update. You can create a release on three different testing tracks or to production:
-
Open testing: Open testing releases are available to testers on Google Play. Users can join tests from your store listing.
-
Closed testing: Closed testing releases are available to a limited number of testers that you choose, who can test a pre-release version of your app and submit feedback.
-
Internal testing: Internal testing releases are available to up to 100 testers that you choose.
-
Production: Production releases are available to all Google Play users in your chosen countries.
To start your release:
-
Open Play Console and click Create track.
-
Select Internal testing.
-
Internal testing releases are available to up to 100 testers that you choose
-
- Near the top right of the page, click Create new release.
- If Create new release is disabled, you may have outstanding setup tasks to complete. These may be listed on the Dashboard page.
Tip: For more information on testing, go to set up an open, closed, or internal test.
Step 2: Prepare your app's release
-
Follow the on-screen instructions to prepare your release:
-
If this is your first release for this app, follow the instructions to configure Play App Signing.
-
Add your app bundles.
-
Apps created before August 2021 can add app bundles or APKs for app updates.
-
-
2. Select testers and provide a Feedback URL or email address.
Prepare
Google provides the option to safeguard your app signing key. By clicking on Continue, you can proceed with this process. This step is typically required only the first time you publish a release.

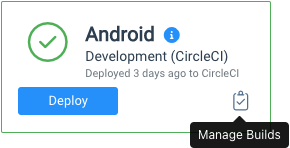
Step 3: Download your AAB file from the CB Dashboard
Navigate to the Android section in the Status tab, then select Build Status. Click on the clipboard icon located in the top right corner of the “Manage Builds” section.
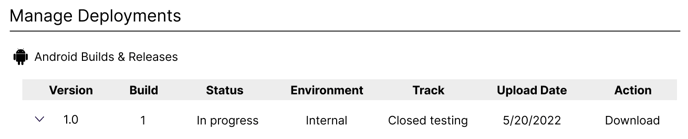
You will see a deployment history table appear, displaying a comprehensive list of your Android builds and releases. In the last column labeled "Action," you can easily download the specific build file linked to that deployment.
Step 4: Upload your AAB file
- Upload your AAB file in the App Bundles and APKs section (this may take a few minutes).
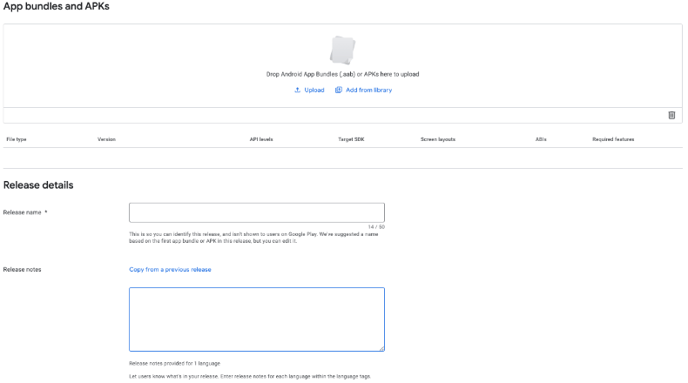
- Add a Release Name and Release Notes in the Release Details section.
- Errors, Warnings, and Messages will let you know if there are any issues with your release or any information you should be aware of. Errors will prevent you from publishing your release. Warnings and Messages will not prevent you from publishing a release.
- New App Bundles and APKs will show any new APK or AAB files you have added to this release.
- Release Notes will show the release notes for this release.
- Click Start Rollout to publish your app to the Internal track!
Step 4: Add a privacy policy
Apps that request access to sensitive permissions or data (as defined in the user data policies) are required by the Google Play Store to include a privacy policy.
Congratulations! Your app is now set up on the Google Play Store. For more information, refer to the official Google Play Console Help.